HubSpot offers a lot of functionality. One of the things it does best is providing you one powerful, easy-to-use platform to run complete inbound marketing campaigns at scale. HubSpot allows you to utilize their Email Marketing tools for FREE, and also as part of their premium Marketing Hub editions.
Default Subscription Management
If you are using HubSpot to manage your email marketing, you may or may not already be aware: When you create a new email campaign in HubSpot, you MUST include a link to allow your customer to manage their subscription preferences page. However, what you may not be aware of is that by default, the subscription preferences page looks like this:
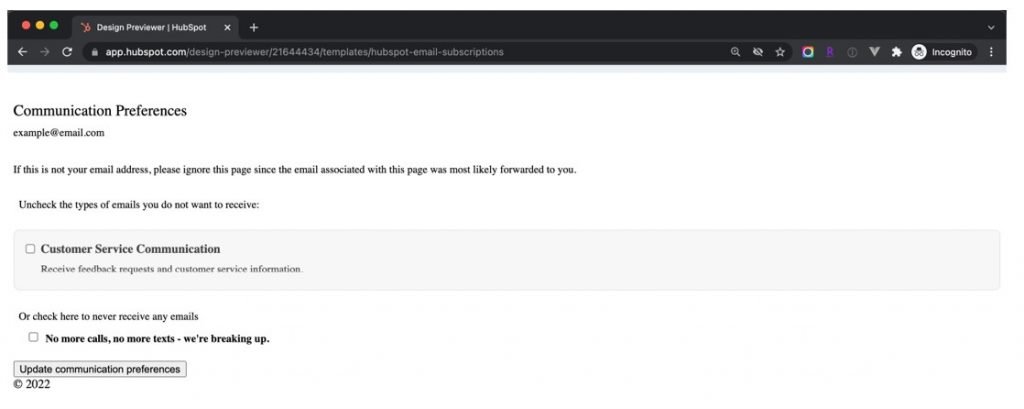
HubSpot provides Subscription Preferences pages with a plain-text, non-styled template that is enabled by default and can leave your customers confused thinking something is broken. Your customer may be thinking “Did they forget to style this page or did I land on a bad link? Is this even for the right company? I don’t see a logo or company name.” None of which is a good thing.
It’s always baffled us why HubSpot does this by default. In HubSpot’s defense, it is part of their Onboarding Checklist to go in and update these subscription preferences pages. But if you forgot, or just don’t know how, your customers could be landing on this page and thinking those same thoughts
Out of the Box Templates
It takes some knowledge and confidence to navigate within the HubSpot platform to be able to edit certain settings. We’re here to help show you where and how to update your Subscription Preferences pages so that they match your branding and look as professional as your email campaigns!
There are several ways to go about this.
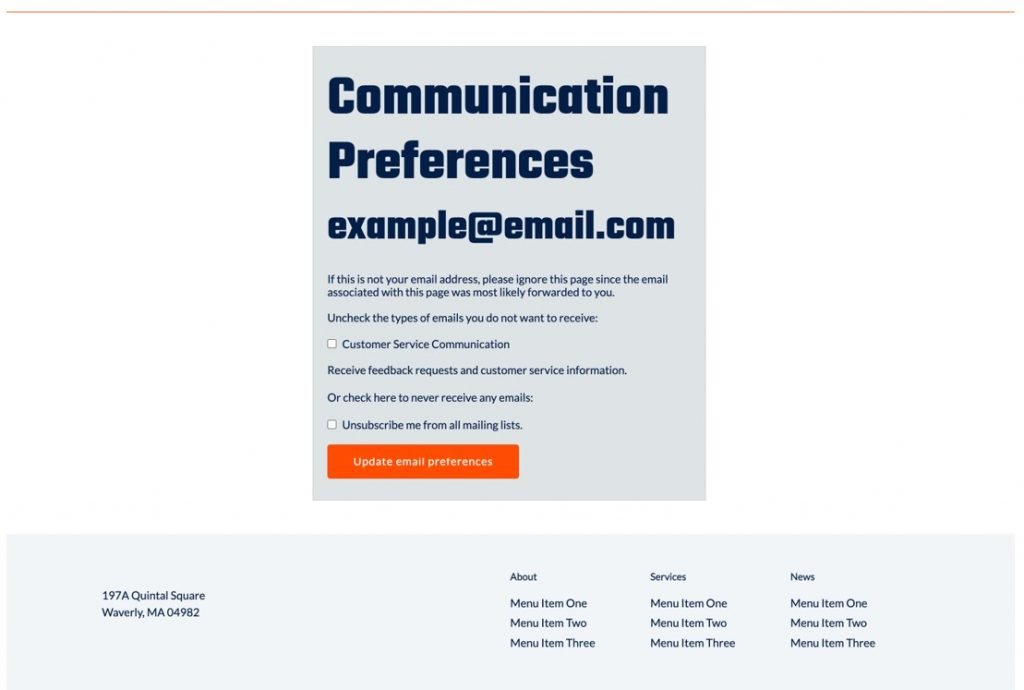
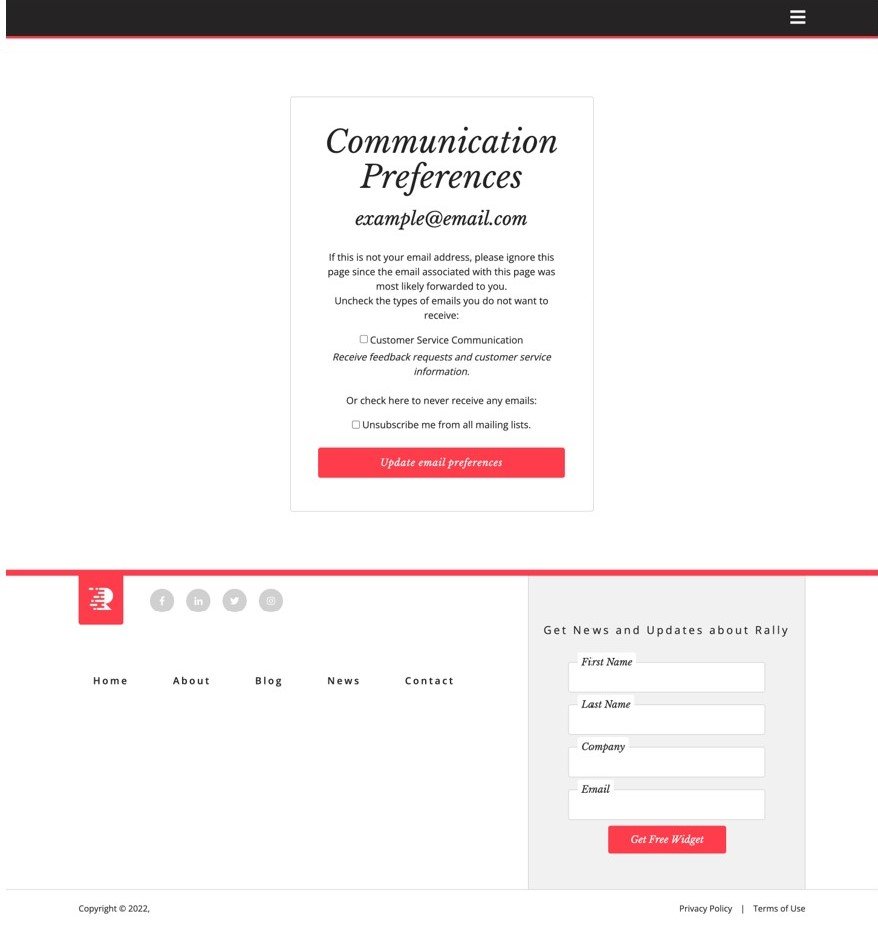
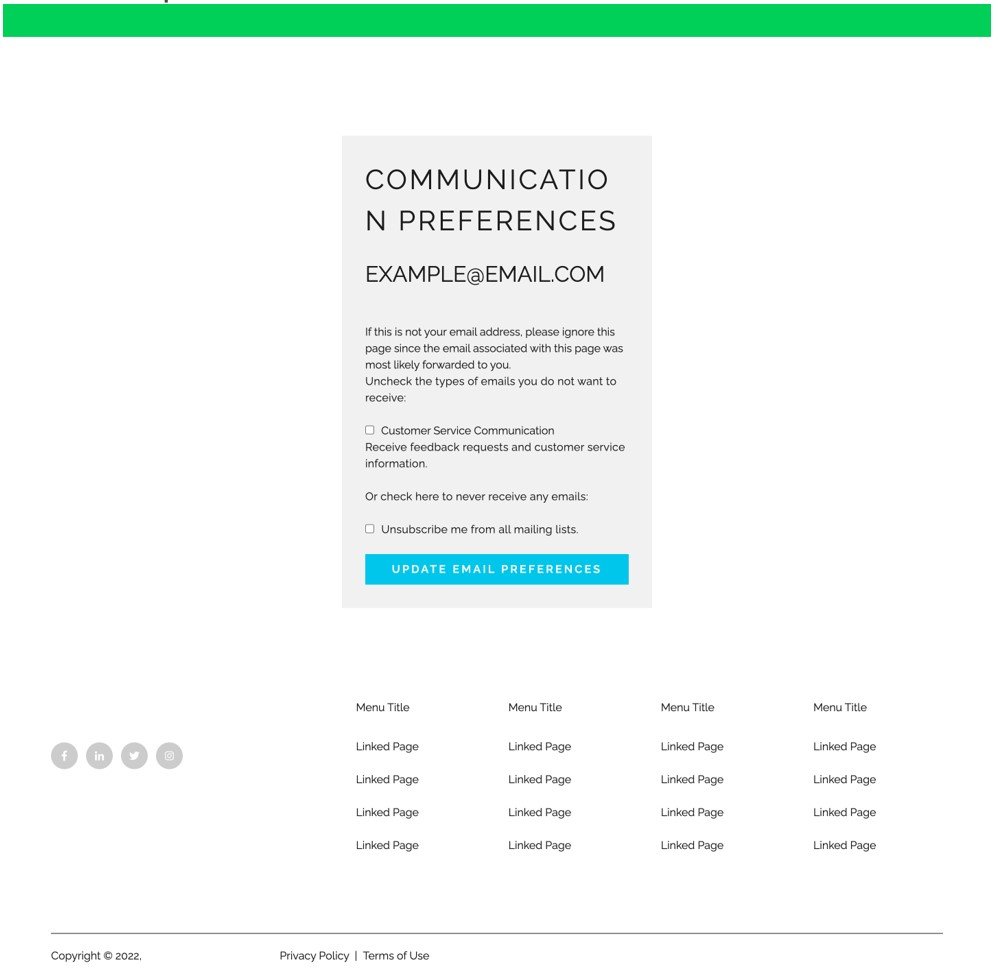
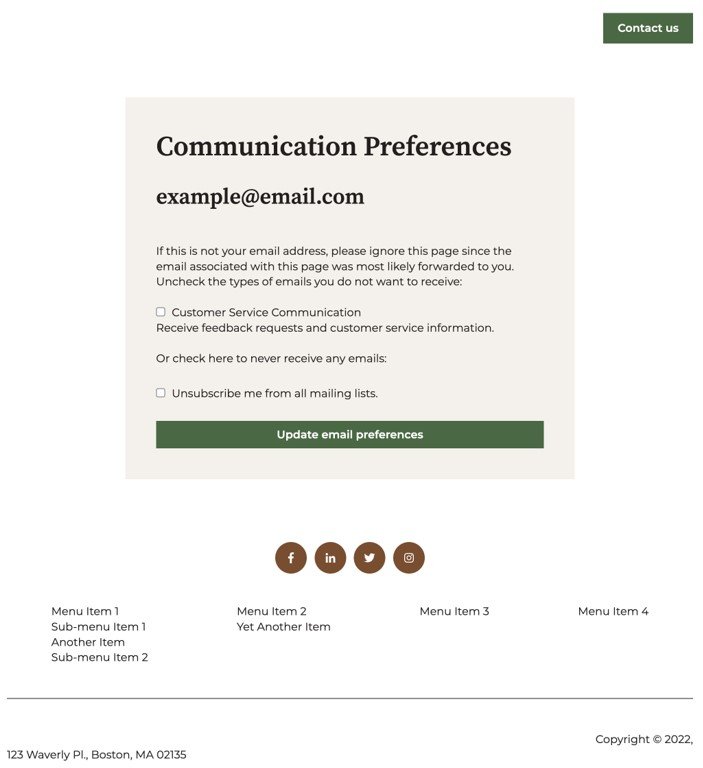
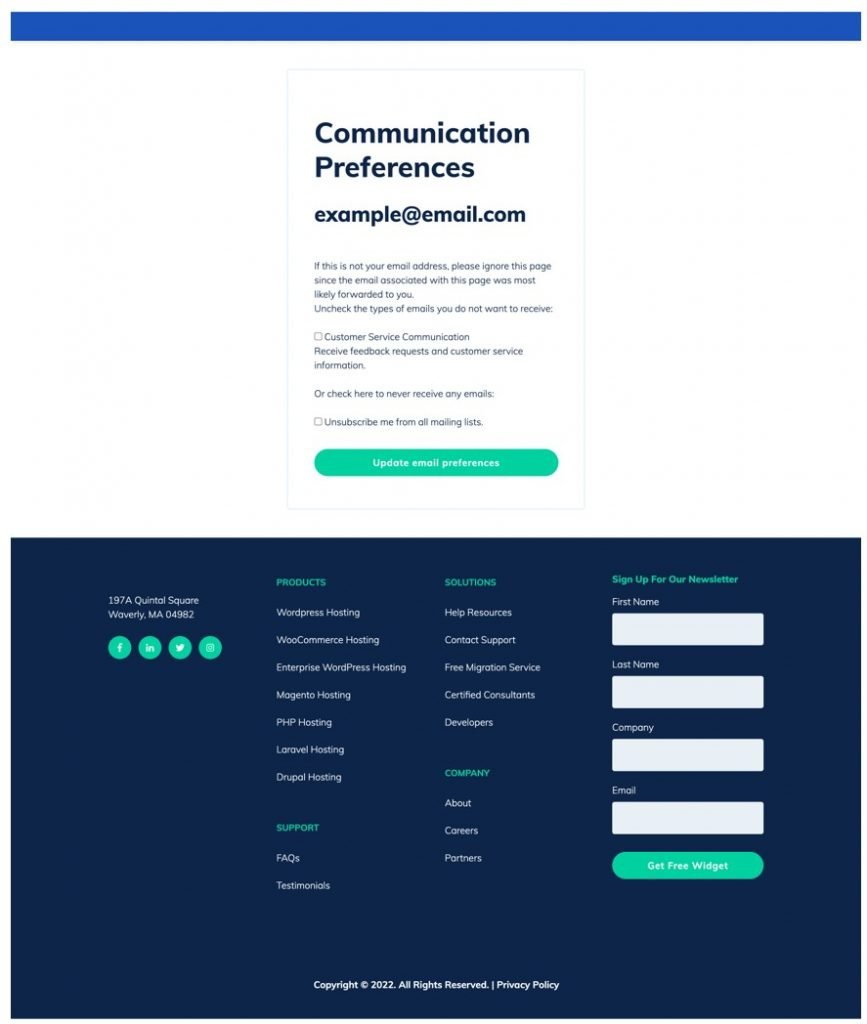
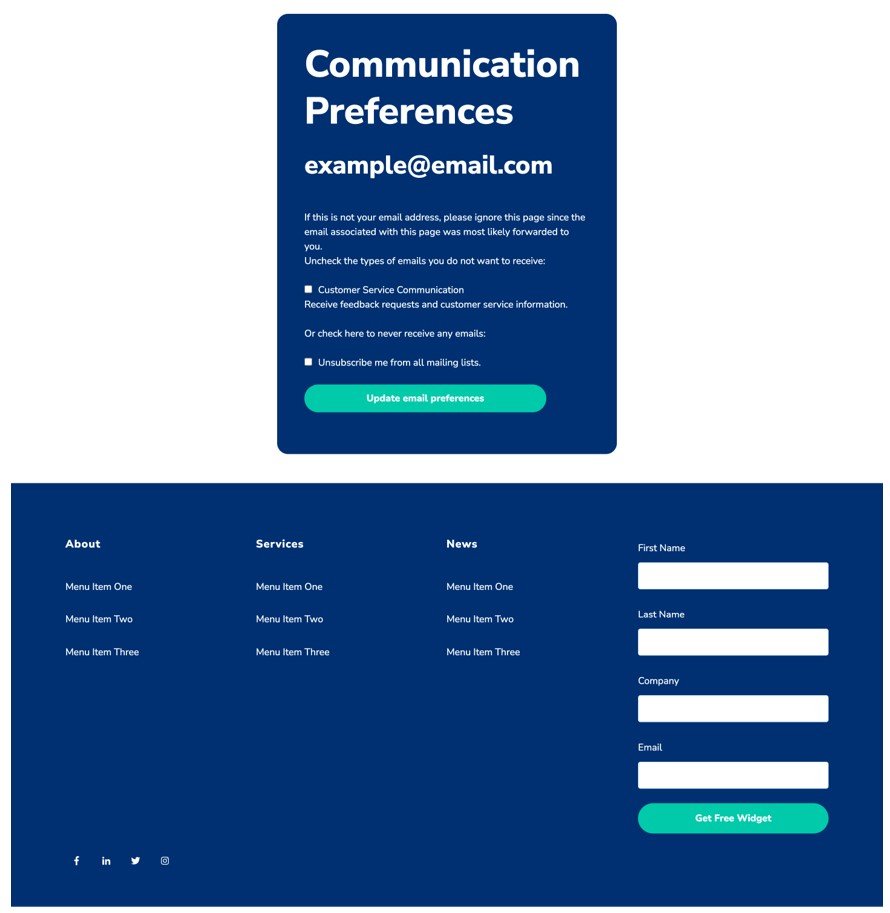
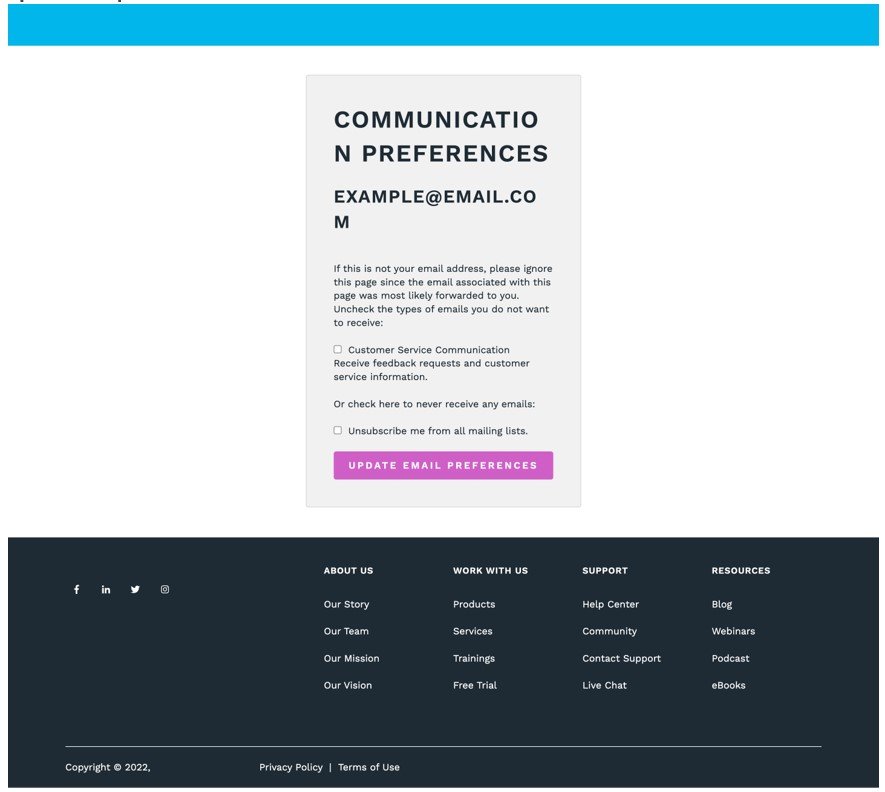
First, it’s good to know that HubSpot now offers several Subscription Page templates out of the box. These templates are shown below, with the template name under each screen shot.
Installing a Third Party Template
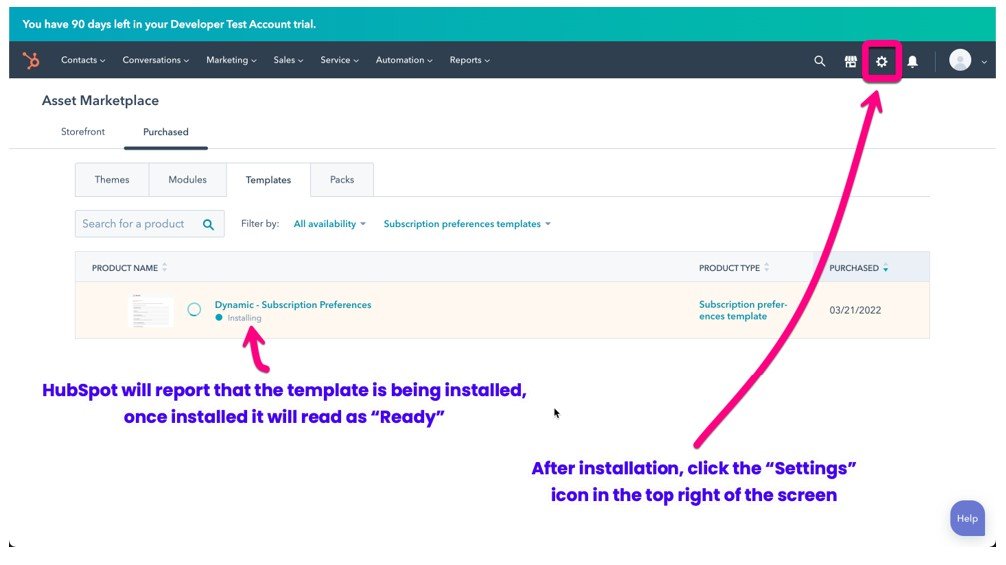
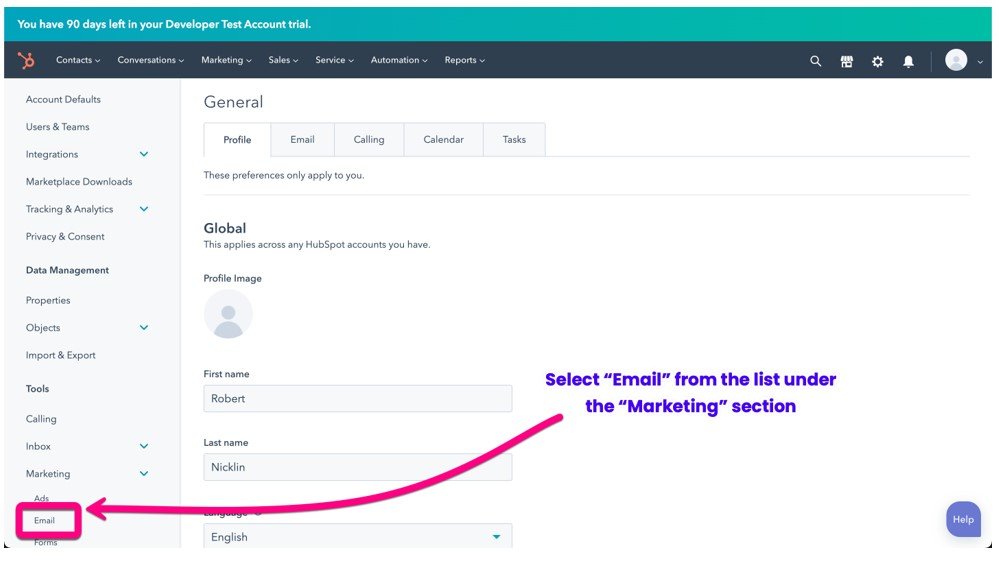
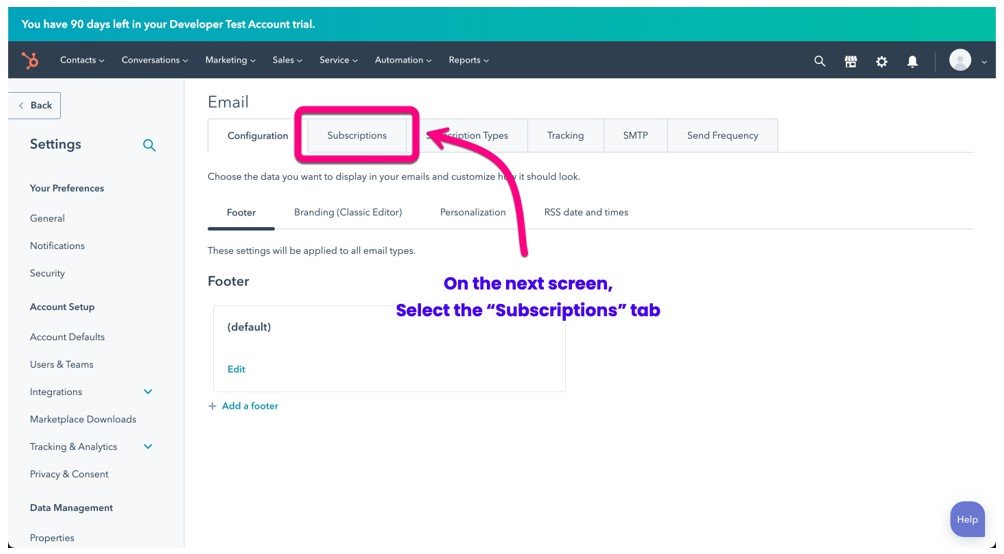
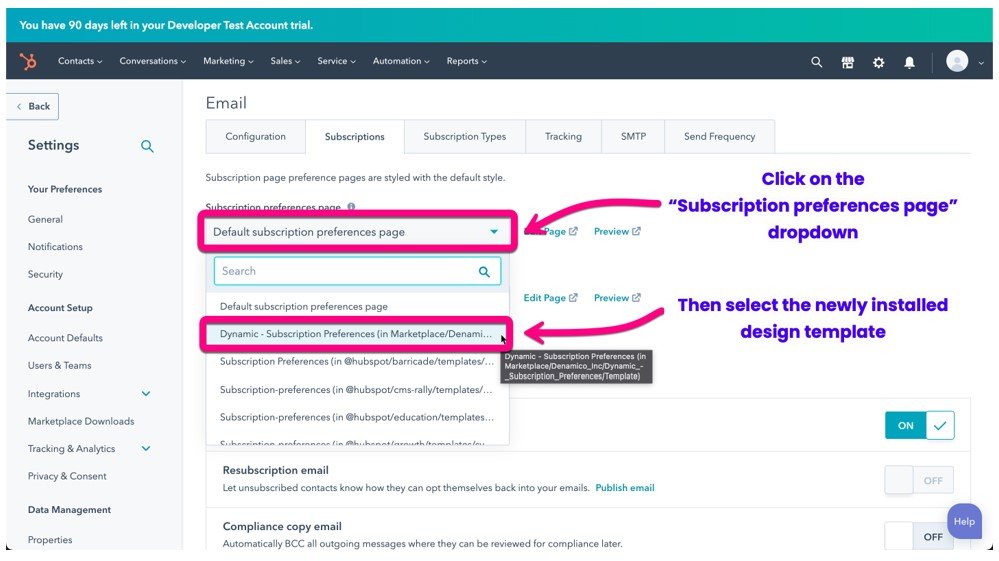
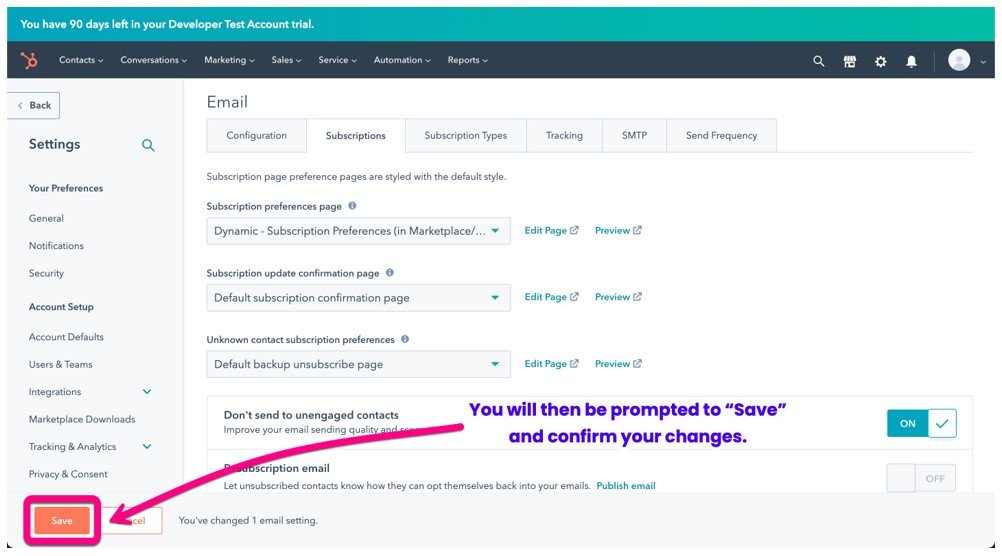
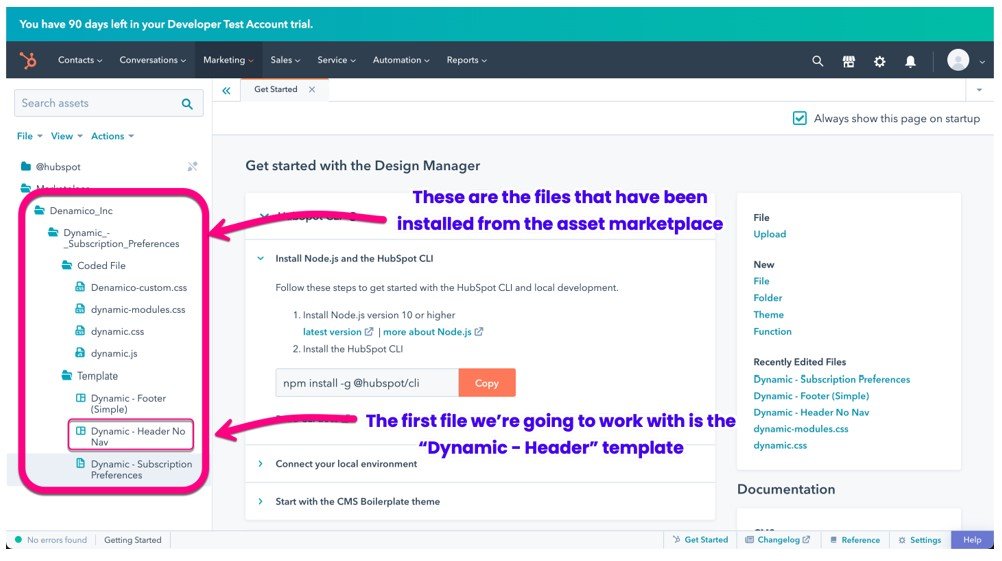
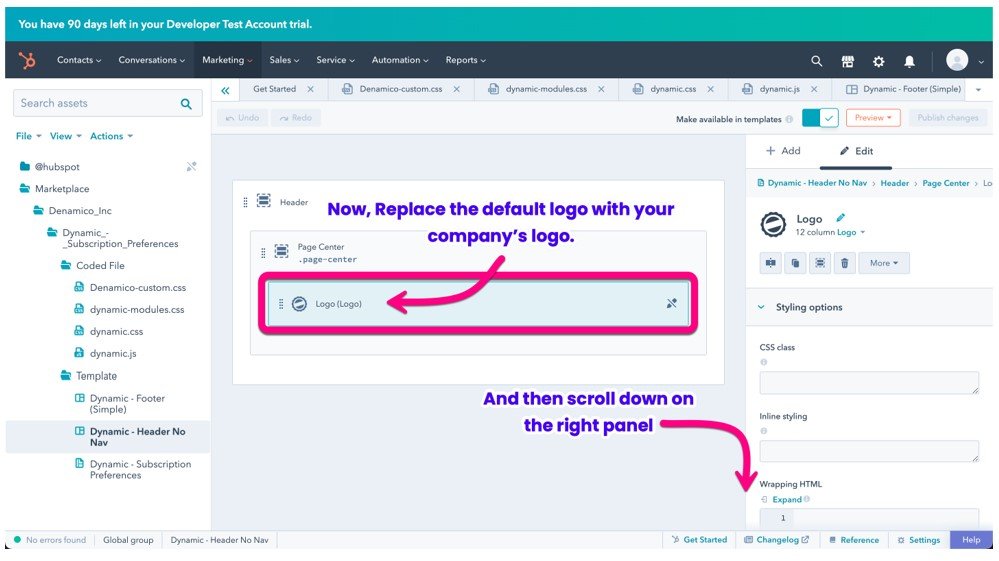
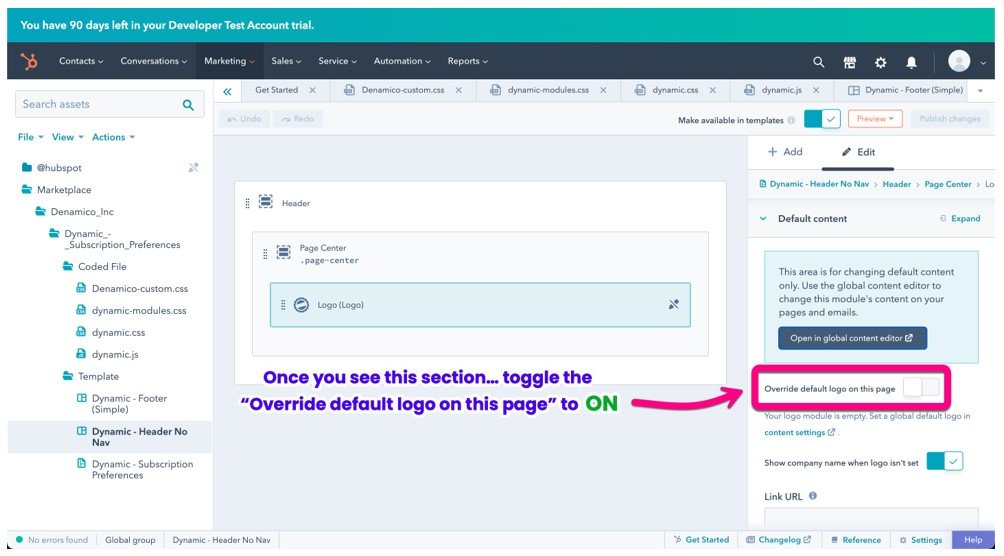
However, our preferred template is provided by a third-party in the HubSpot Asset Marketplace. Follow the steps below to locate the template, install it, and configure HubSpot to use your new template. We’ve provided step by step screenshots with the instructions to make it easier, so let’s get started!
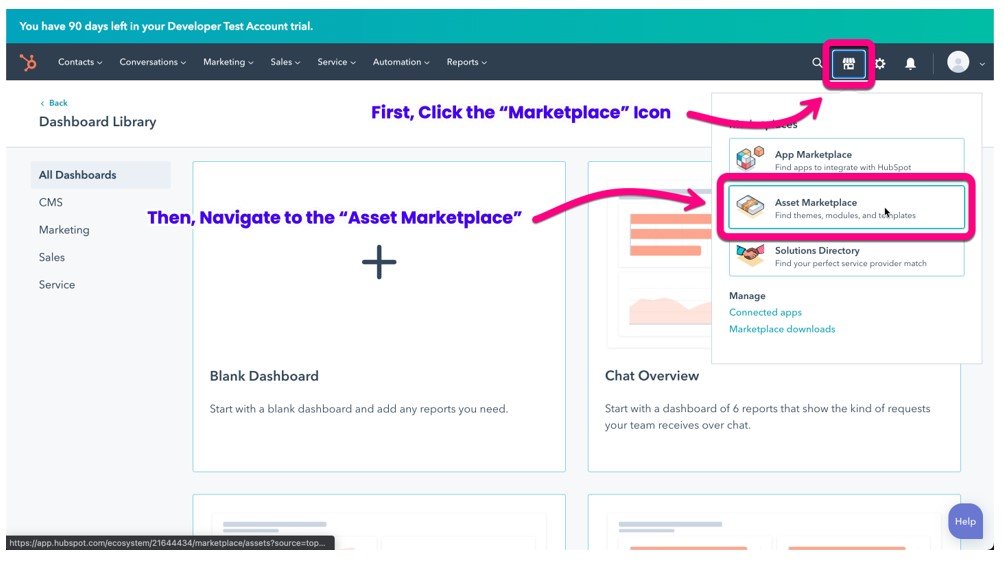
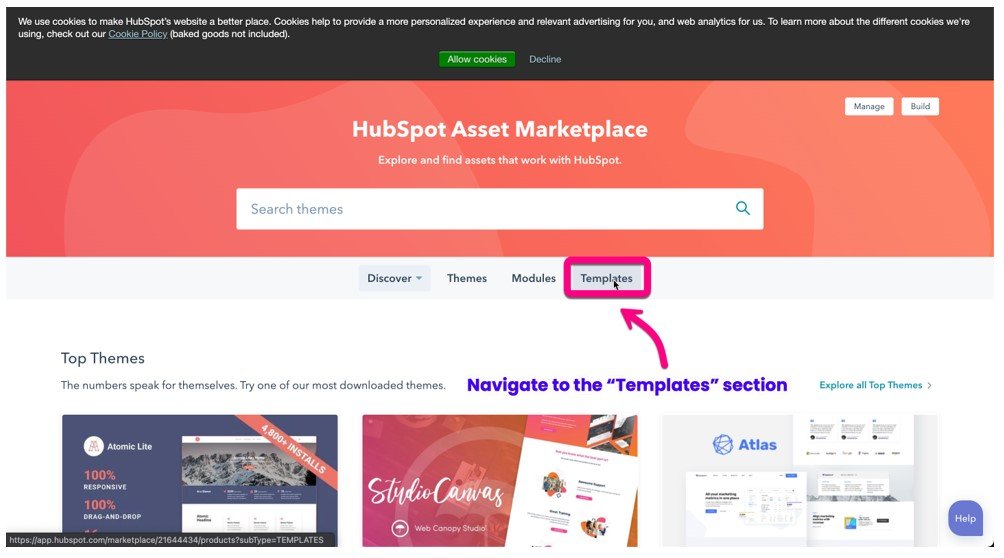
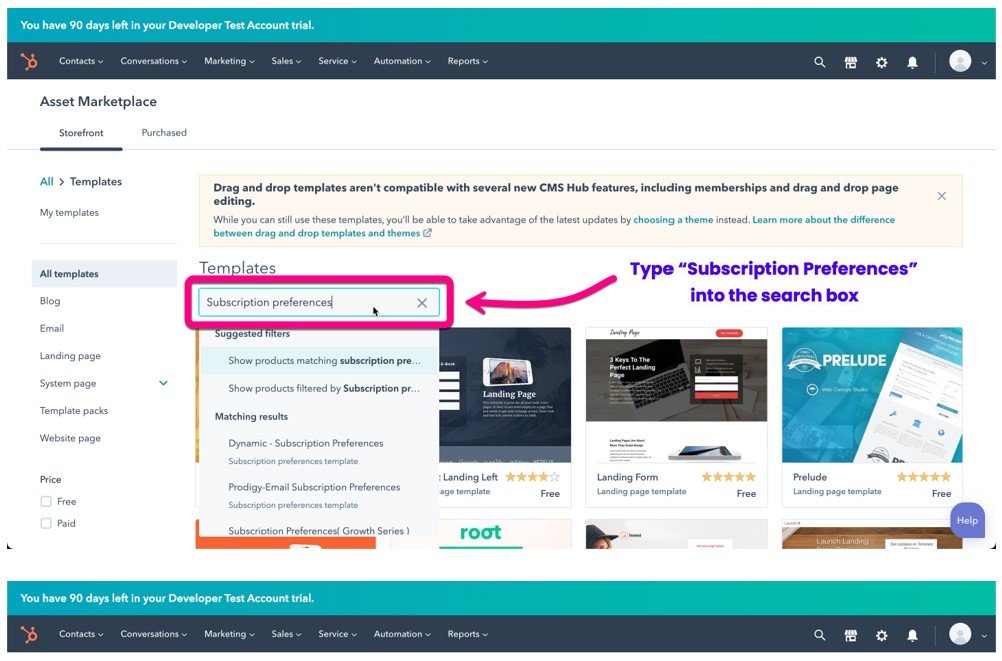
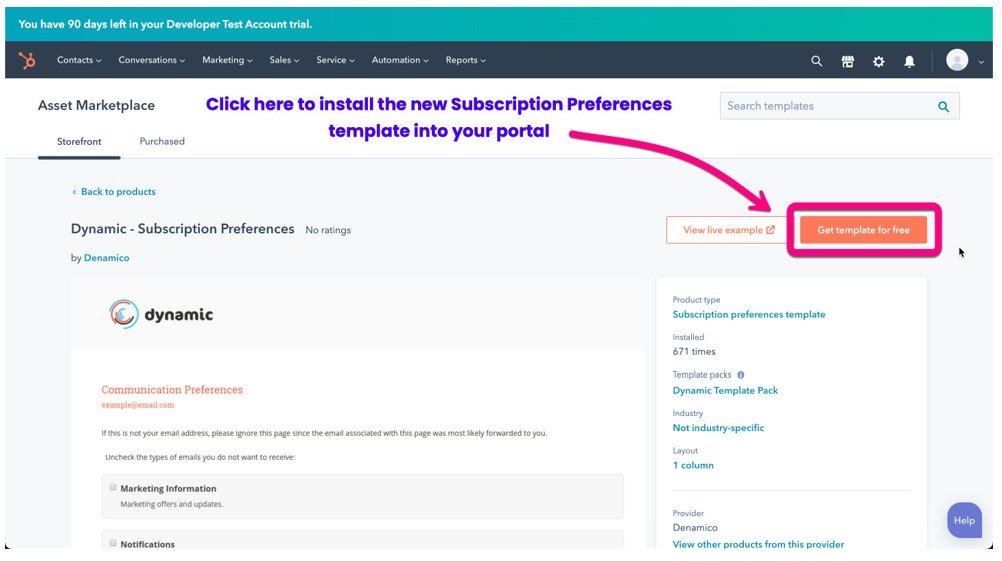
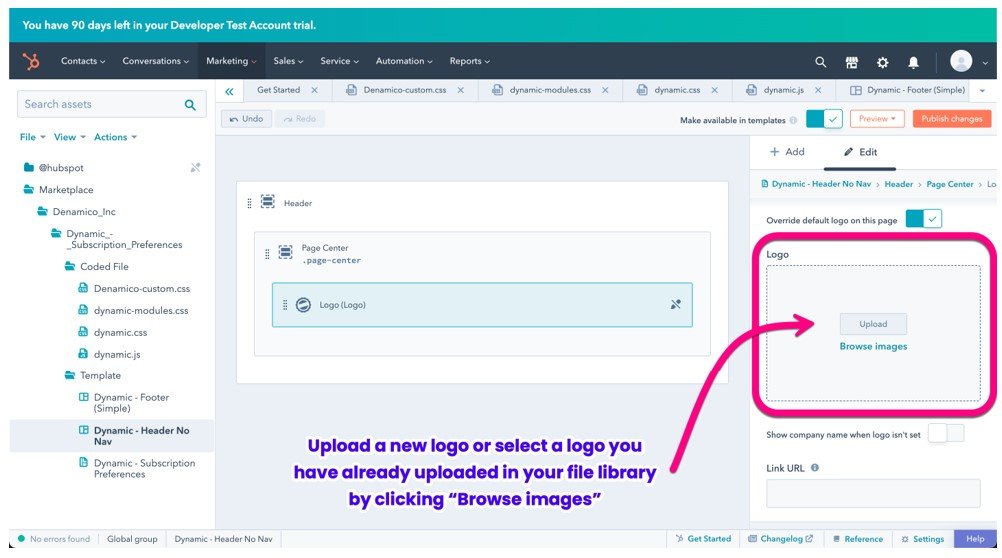
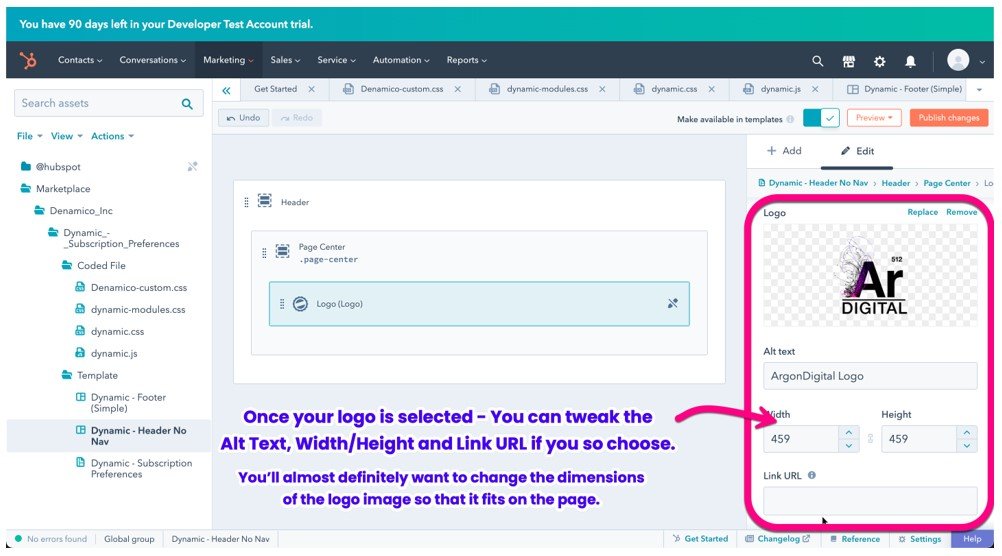
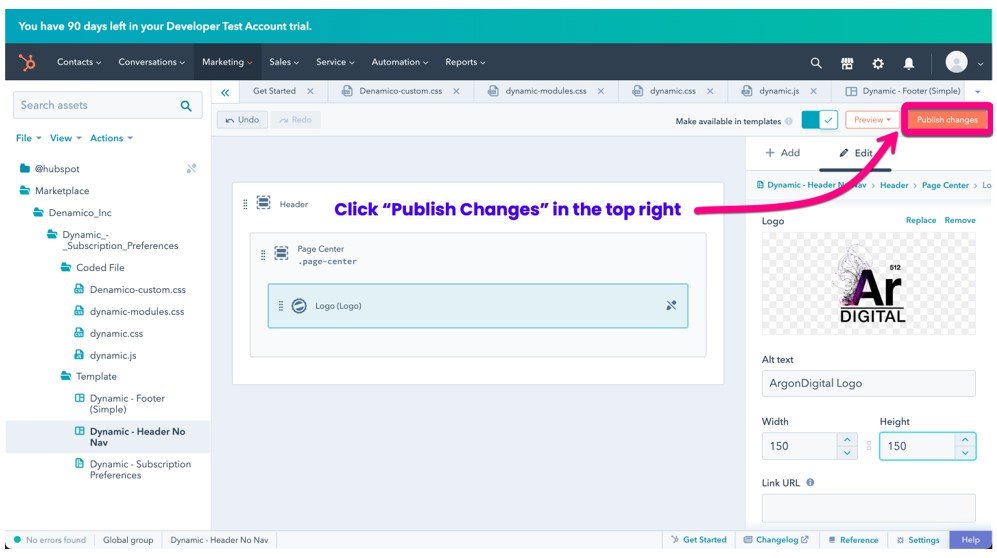
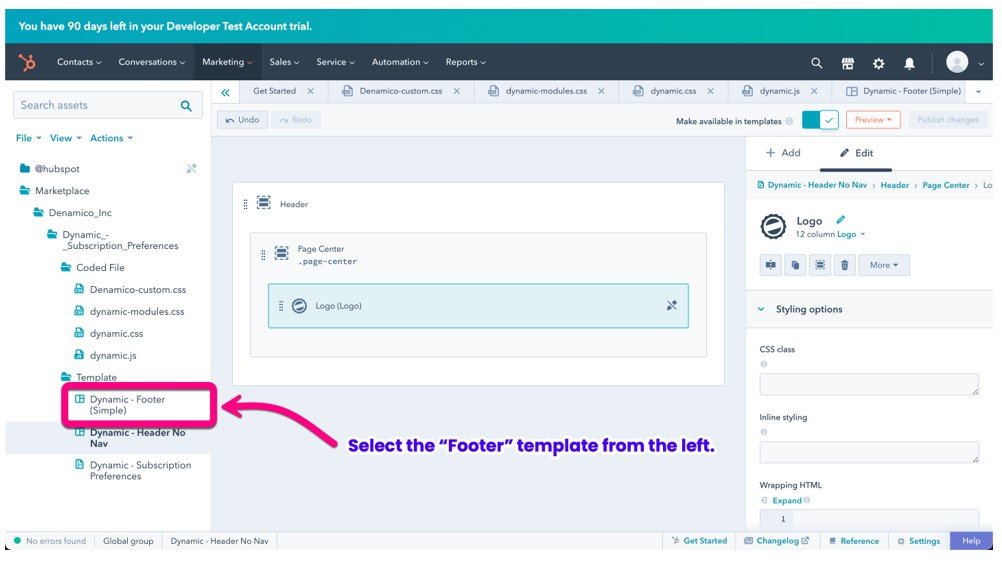
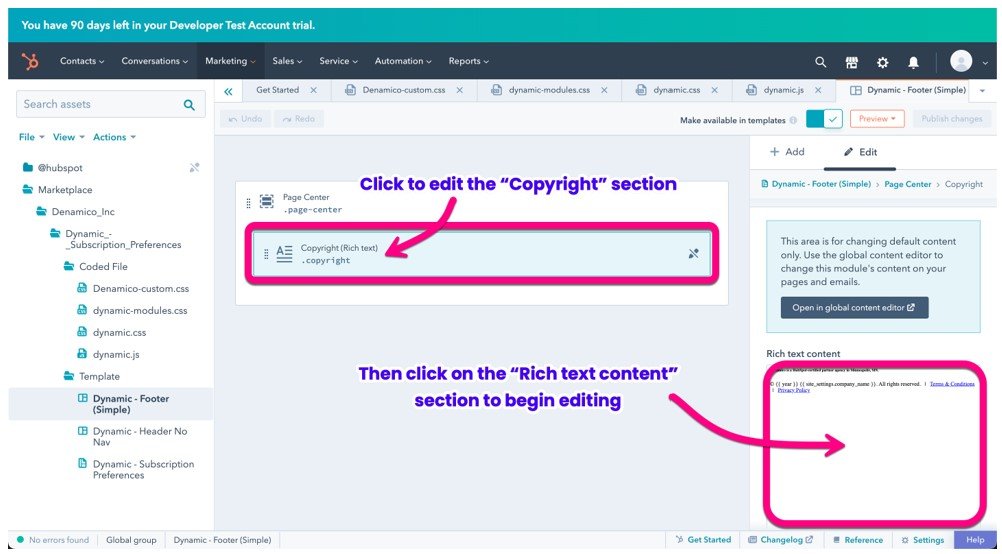
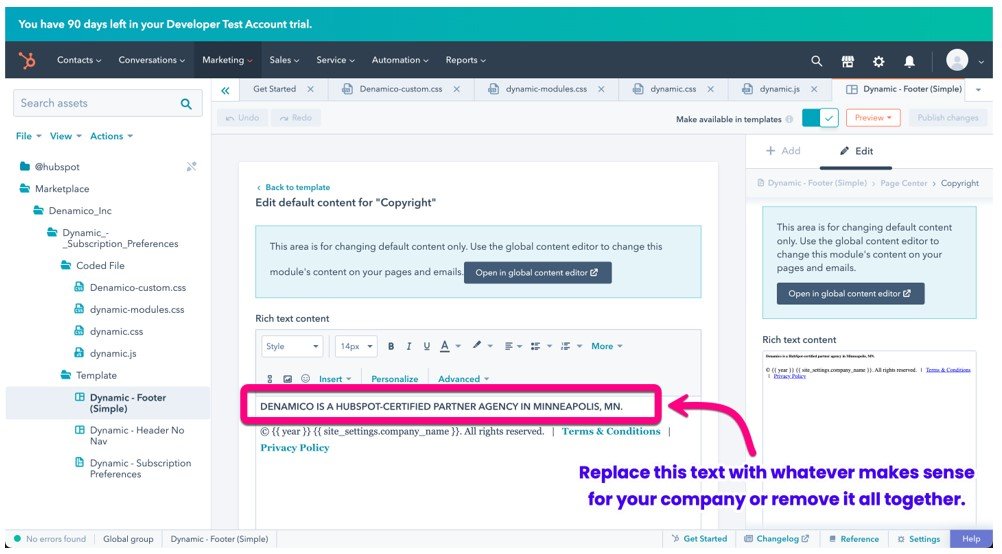
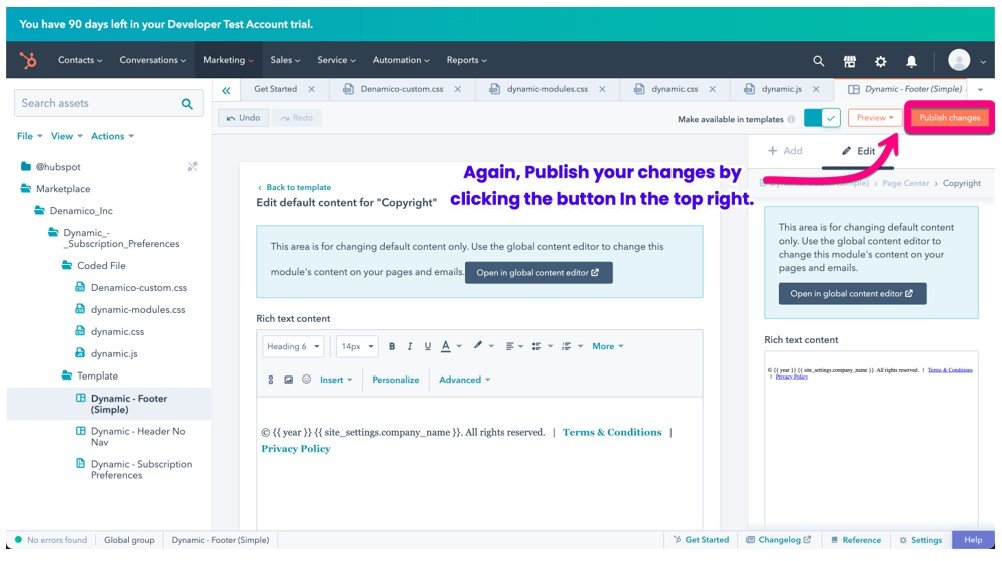
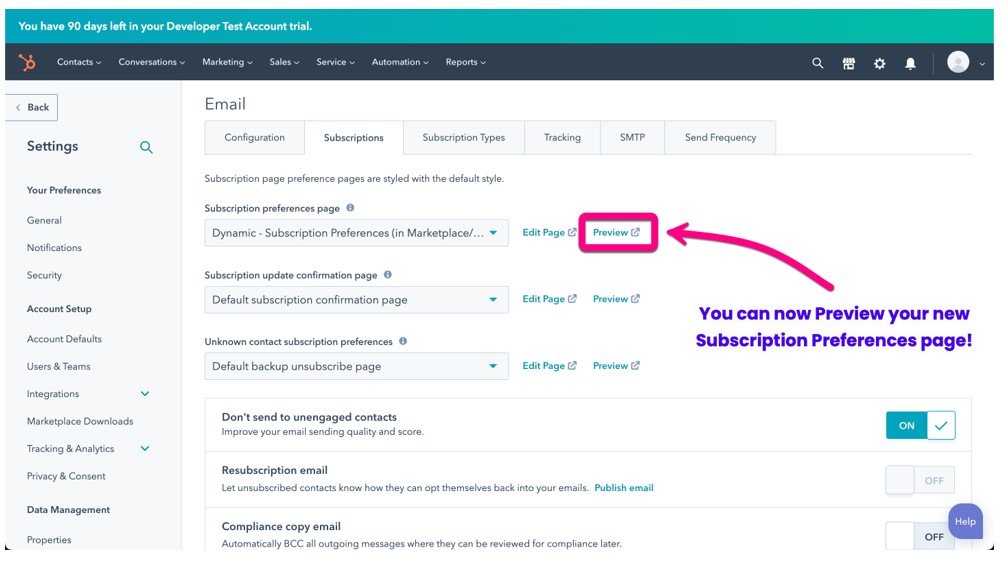
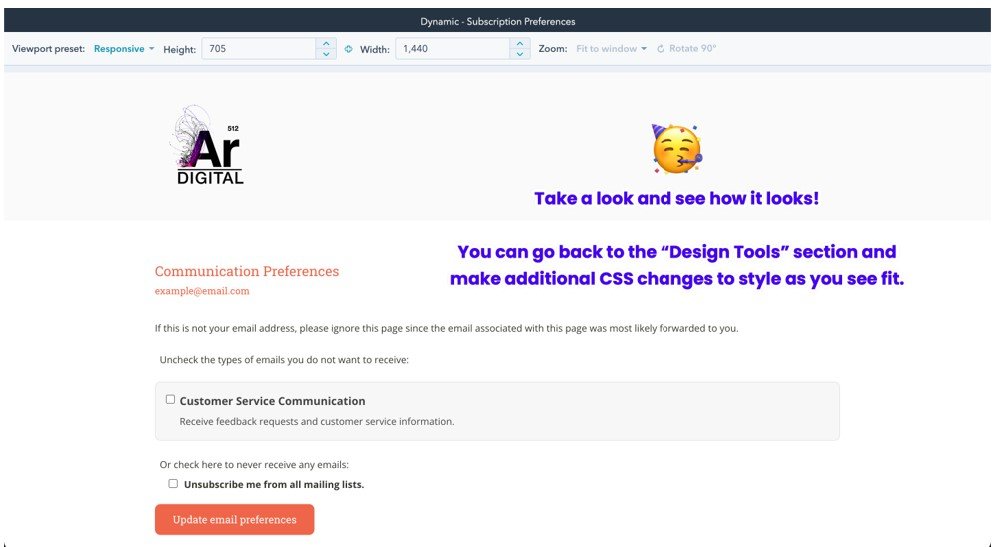
Hopefully these step-by-step instructions for installing and customizing a HubSpot Subscription Preferences template are helpful. If you’d like help with this or any other aspect of installing and configuring HubSpot for your organization, feel free to reach out with your questions. We’re here to help and we just love doing this stuff.


